• 
Adding New Line Items
IMPORTANT TIP: When Data Entry Fields are ready for entry, they are highlighted in yellow. When you are finished entering data in a field, Press the ENTER Key to go on to the next field. If you need to go back, use the Mouse or Press the UP-Arrow Key.
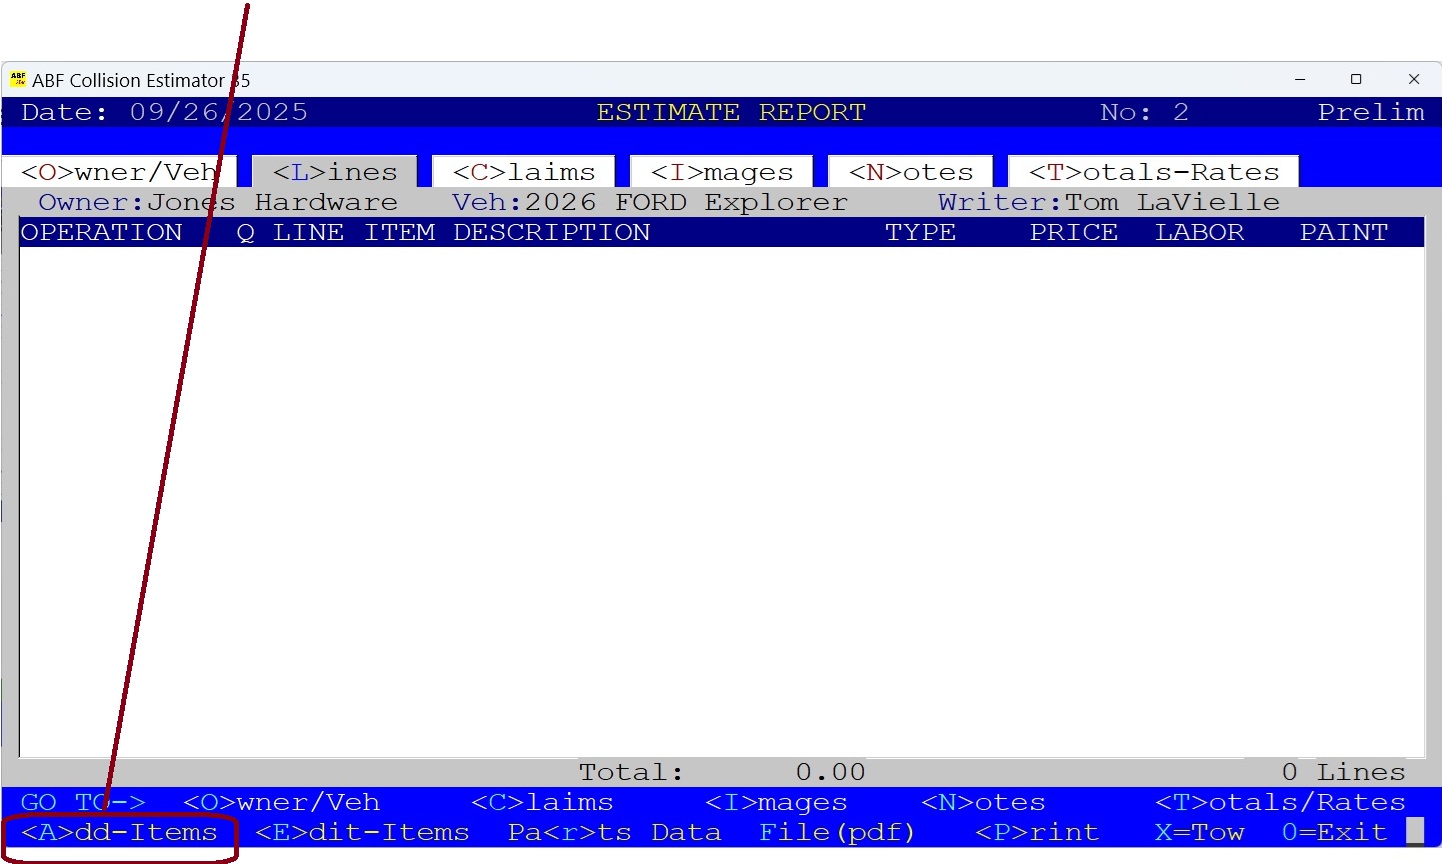
1) Go To the Estimate Screen, Press the "L" Key (Line Items).
Now Press the "A" Key (Add) To add Line Items.
The Screen below shows that there are no line items entered yet.
•
2) The Parts Group/SubGroup Window Appears.
a) The groups/subgroups are organized categories of parts, labor times and paint times. Scroll Up and Down the Groups List using your Mouse or Up/Down Keys. You can also use the Page Up/Down Keys as well.
b) When you make your selection, BE SURE TO SELECT A SUBGROUP THAT SHOWS THE "+" SYMBOL BEFORE IT. (ie: "+FRONT BUMPER COMPONENTS". Now Double-Click or Press the ENTER Key to select the Subgroup you want.
• 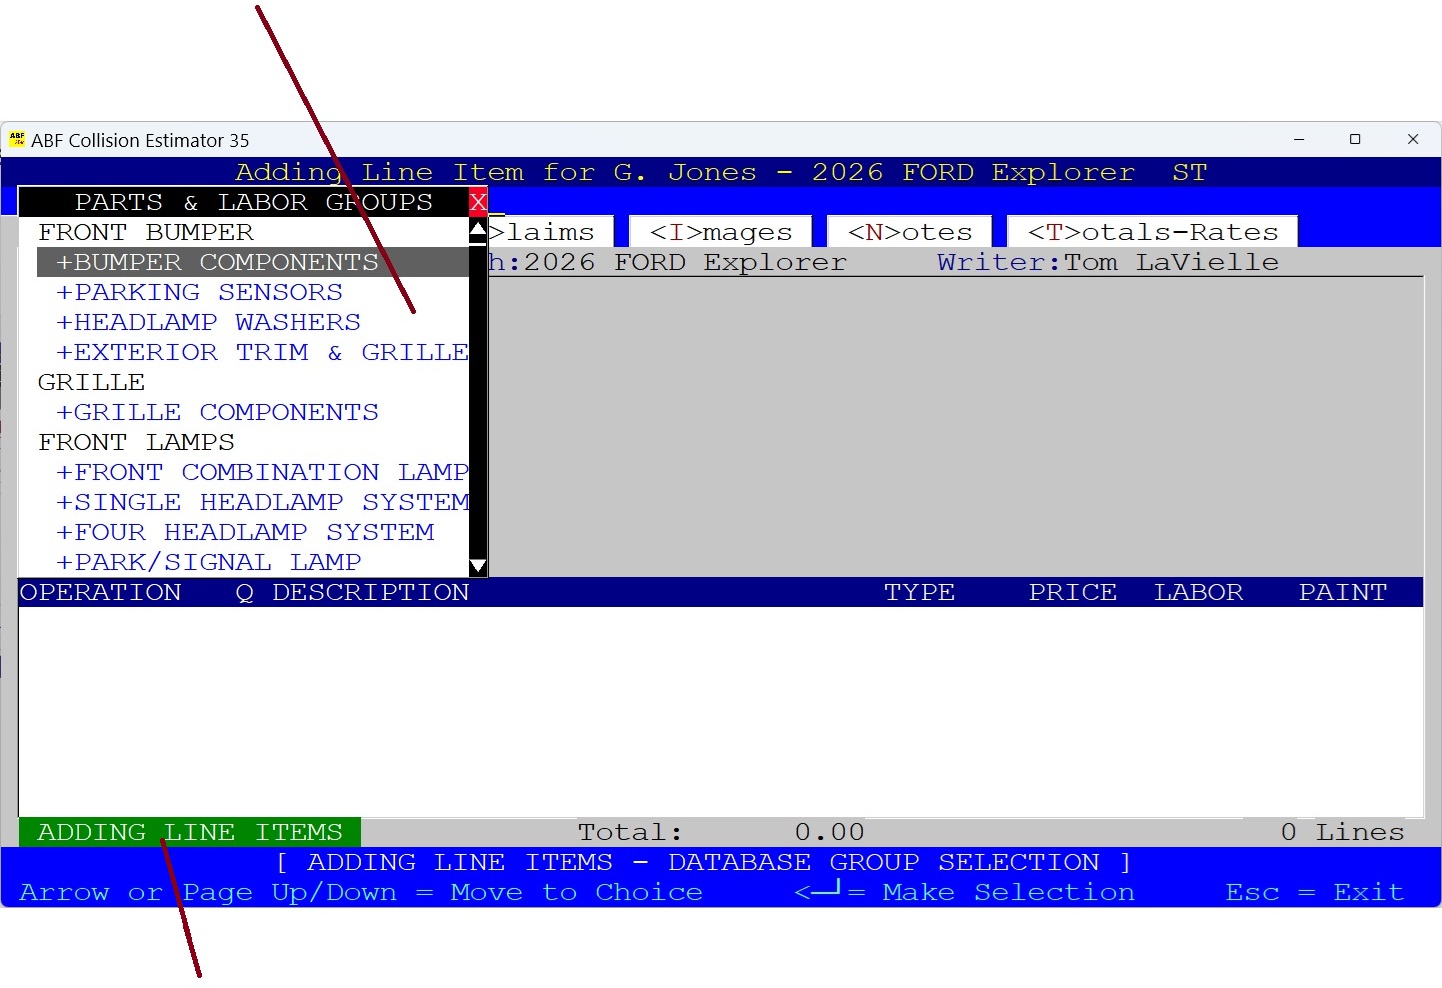
This is the "ADD LINE ITEMS" Indicator when you are Adding Line Items.
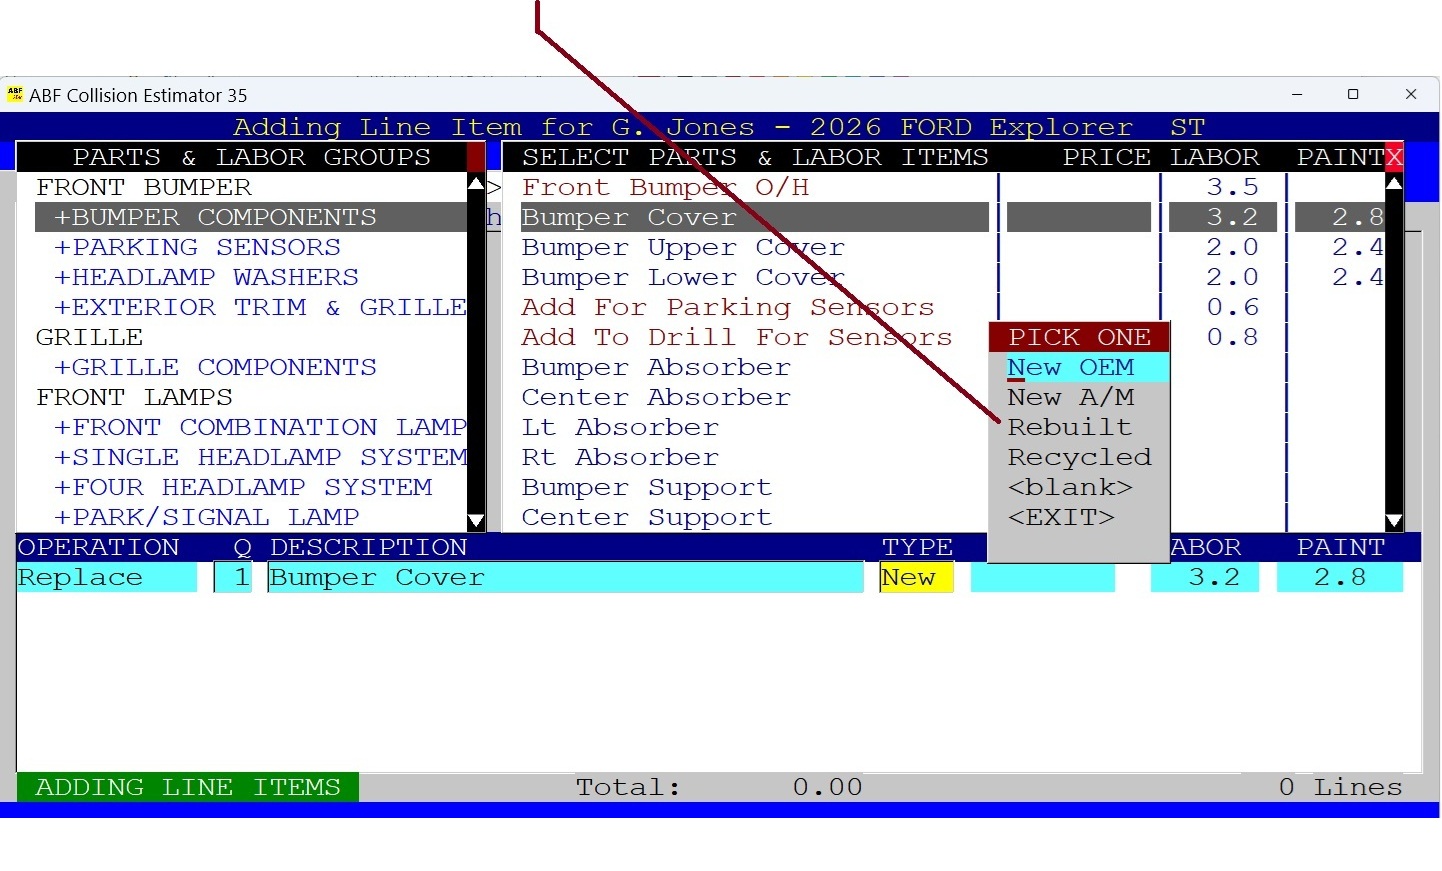
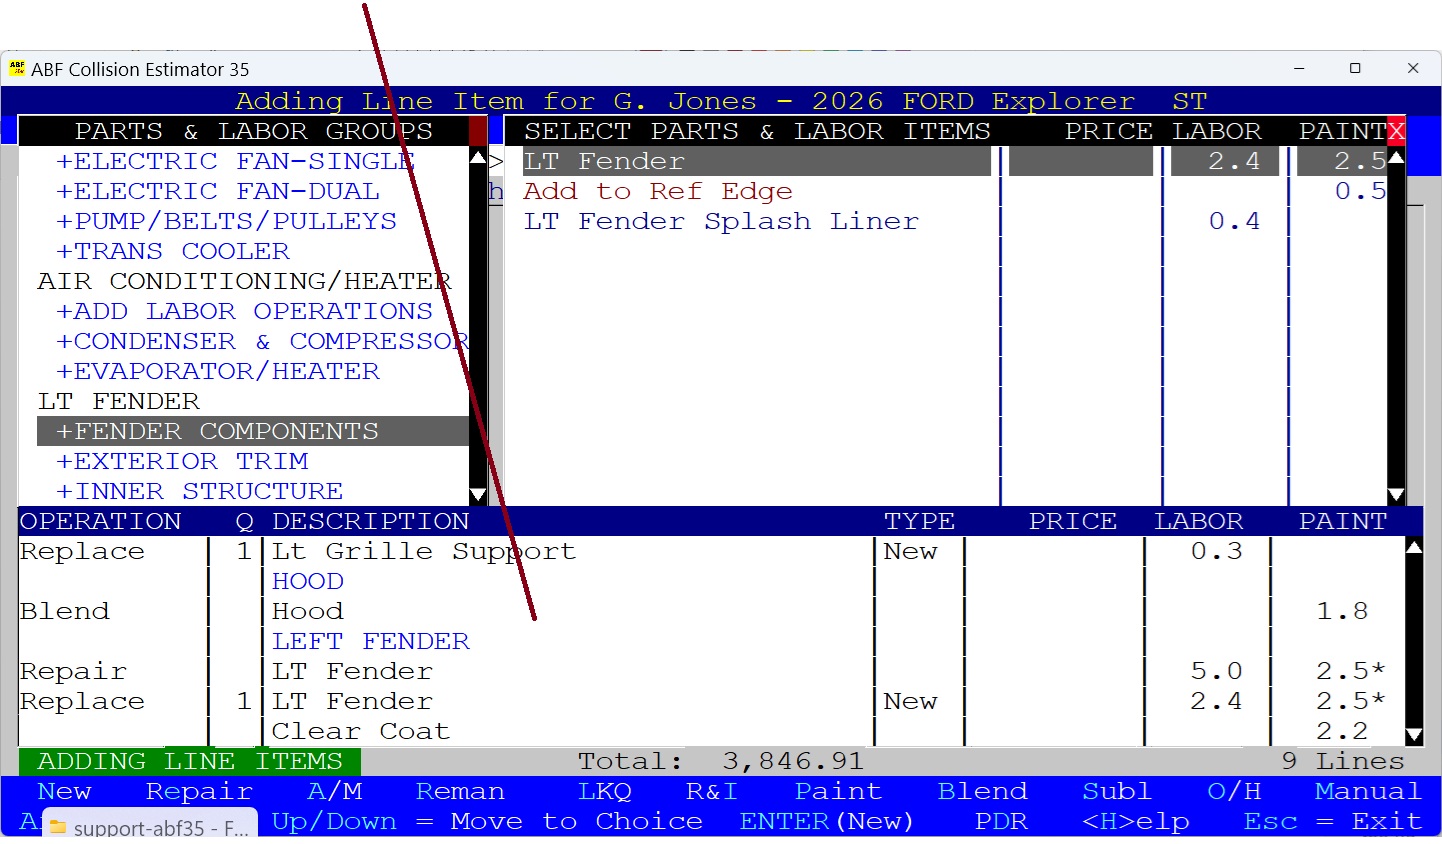
3) Now The Parts/Labor Window Appears.
This is the Window of parts, labor and refinish times. Data Items you select from this Window are placed into your Estimate Line Items.
Use the Mouse or the Keyboard Up and Down Keys to navigate to the part you want. Then Select by Double-Clicking with your mouse or you can Press the ENTER Key.
• 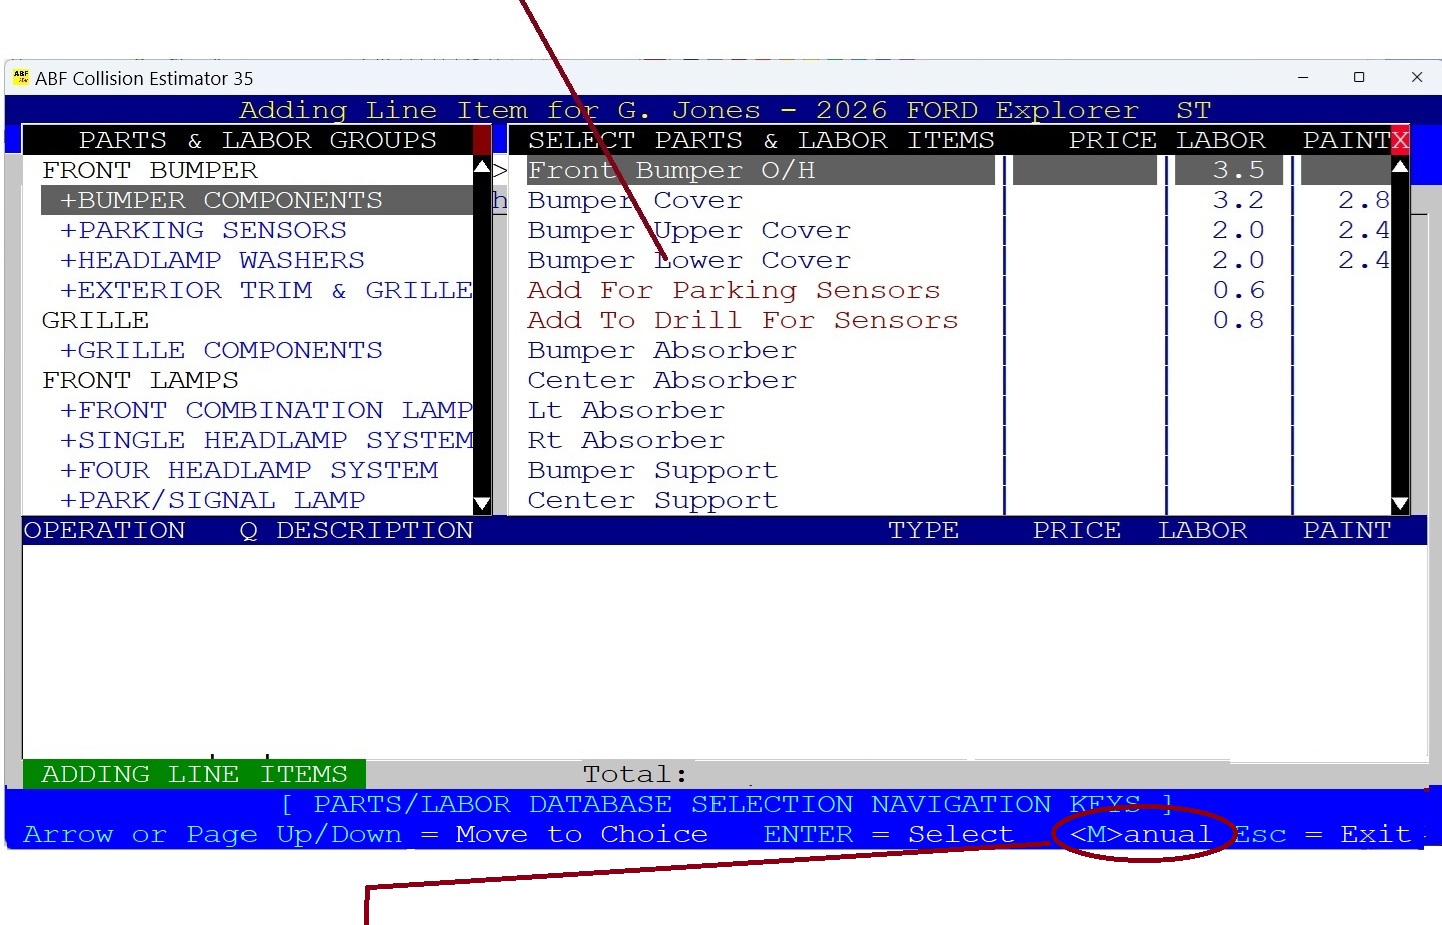
You Can Also Add a Manual Entry Line Item:
Don't see the part you need? Press the "M" Key for Manual Entry. You can enter the description field the way you want.
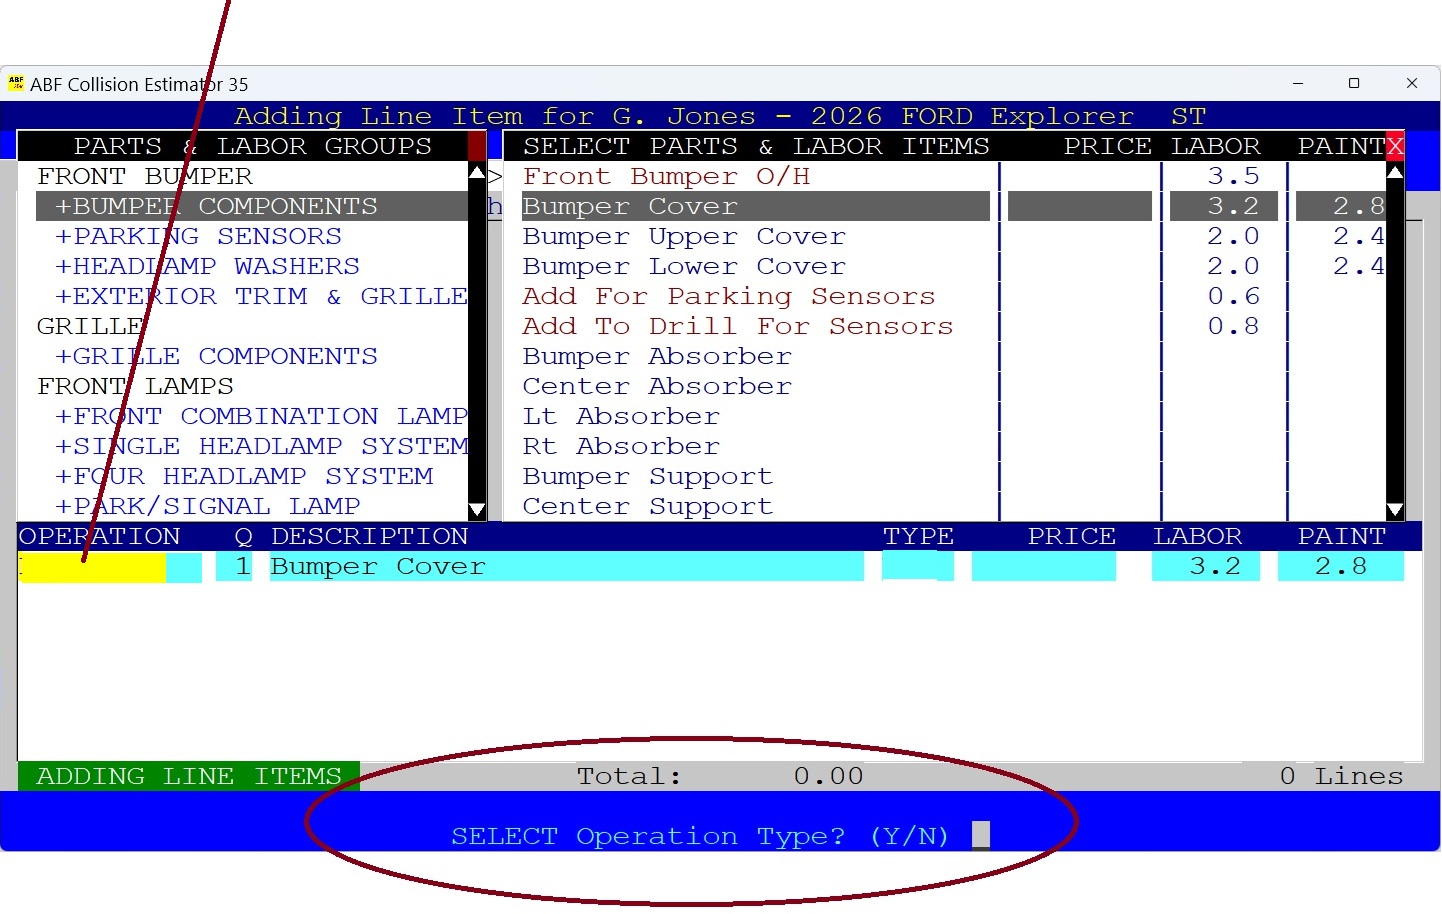
4) Now Select the Operation Type Field.
Press the "Y" Key to Select the Operation Type (Replace, Repair, etc).
• 
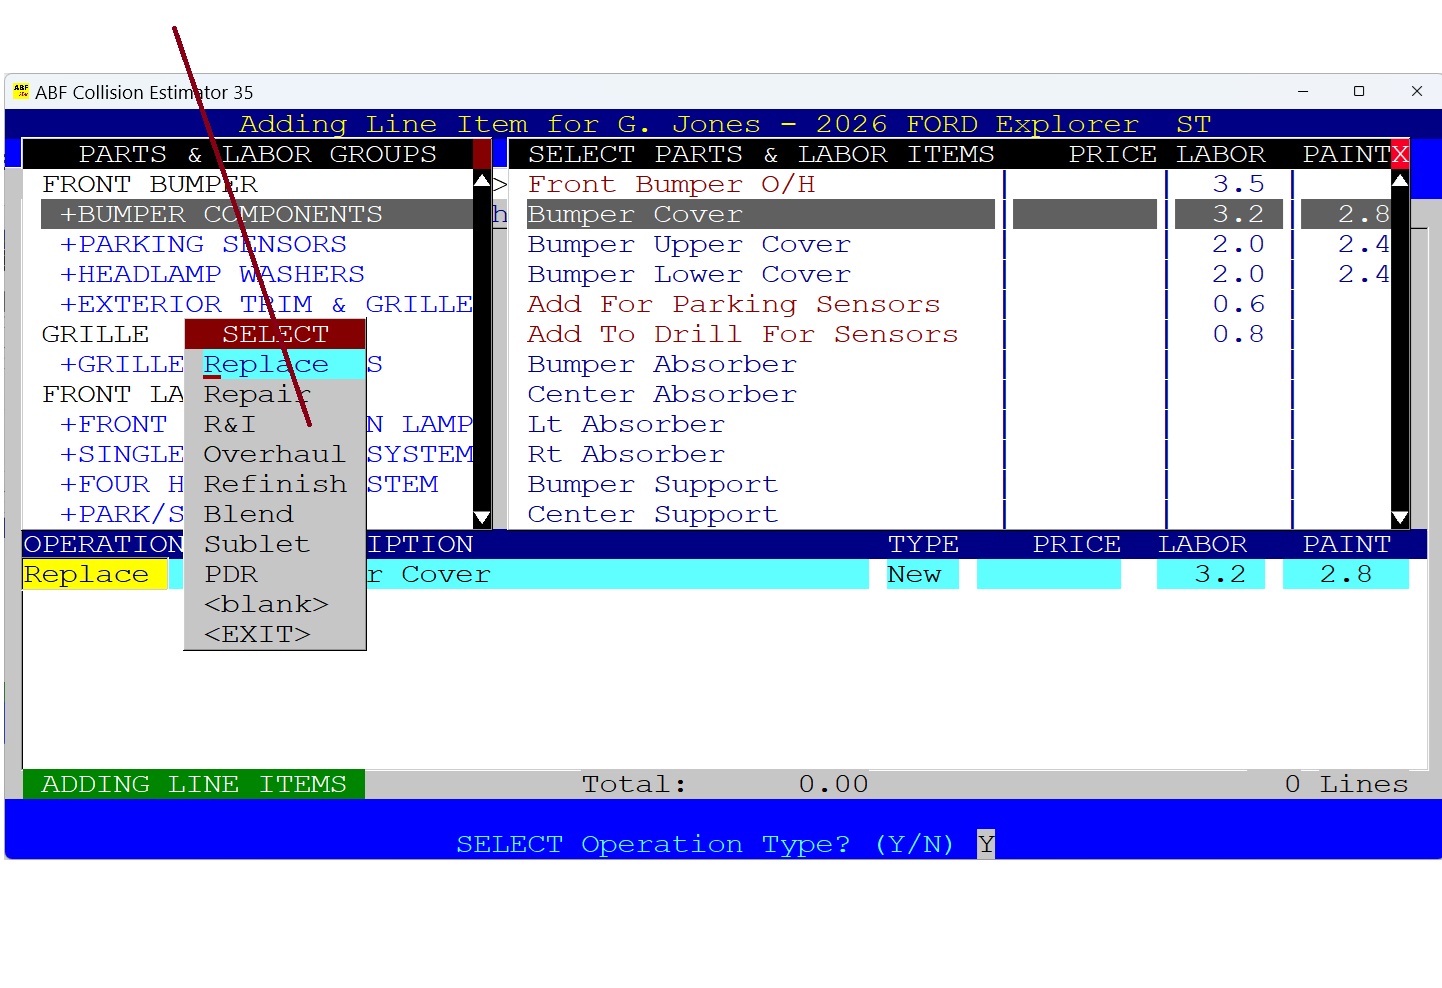
If You Selected "Yes" To Select the Operation Field:
The Pop Up Window of Labor Operations appears, use your Mouse or the Up/Down Keys to Navigate to your choice. Or, Press the Esc Key (Escape) to leave the Operation without making any changes.
• 
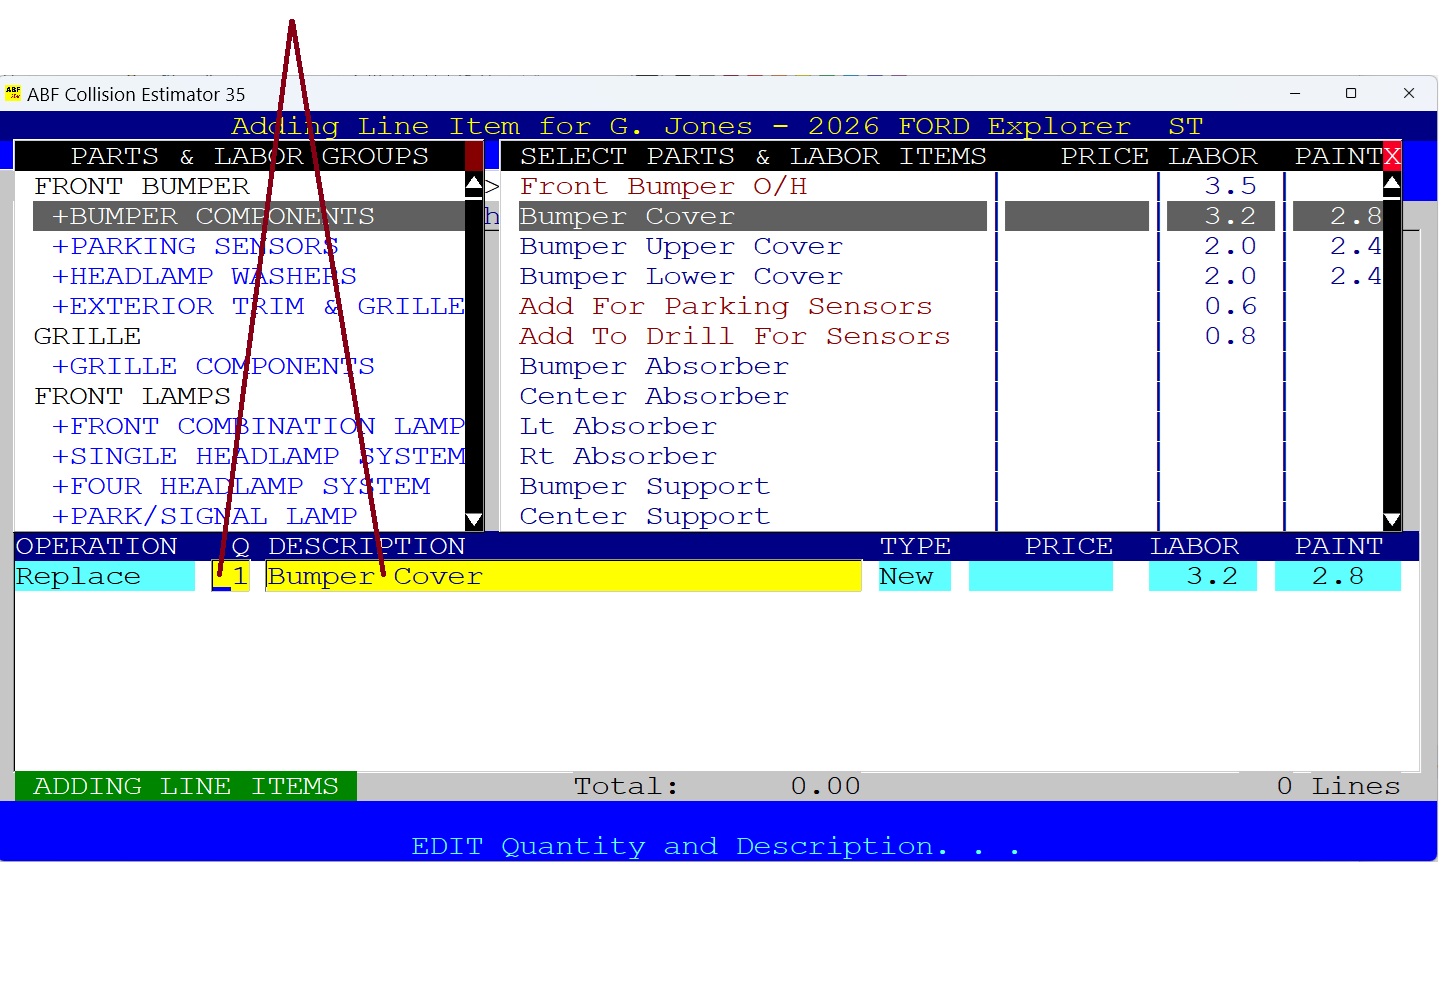
5) Review and Edit the Quantity and Description Fields.
The Quantity Field is for Replace Operations only. The default number is set to 1. The Description Field can be edited as well. If no editing is required, just press the Enter Key to Continue to the next field.
• 
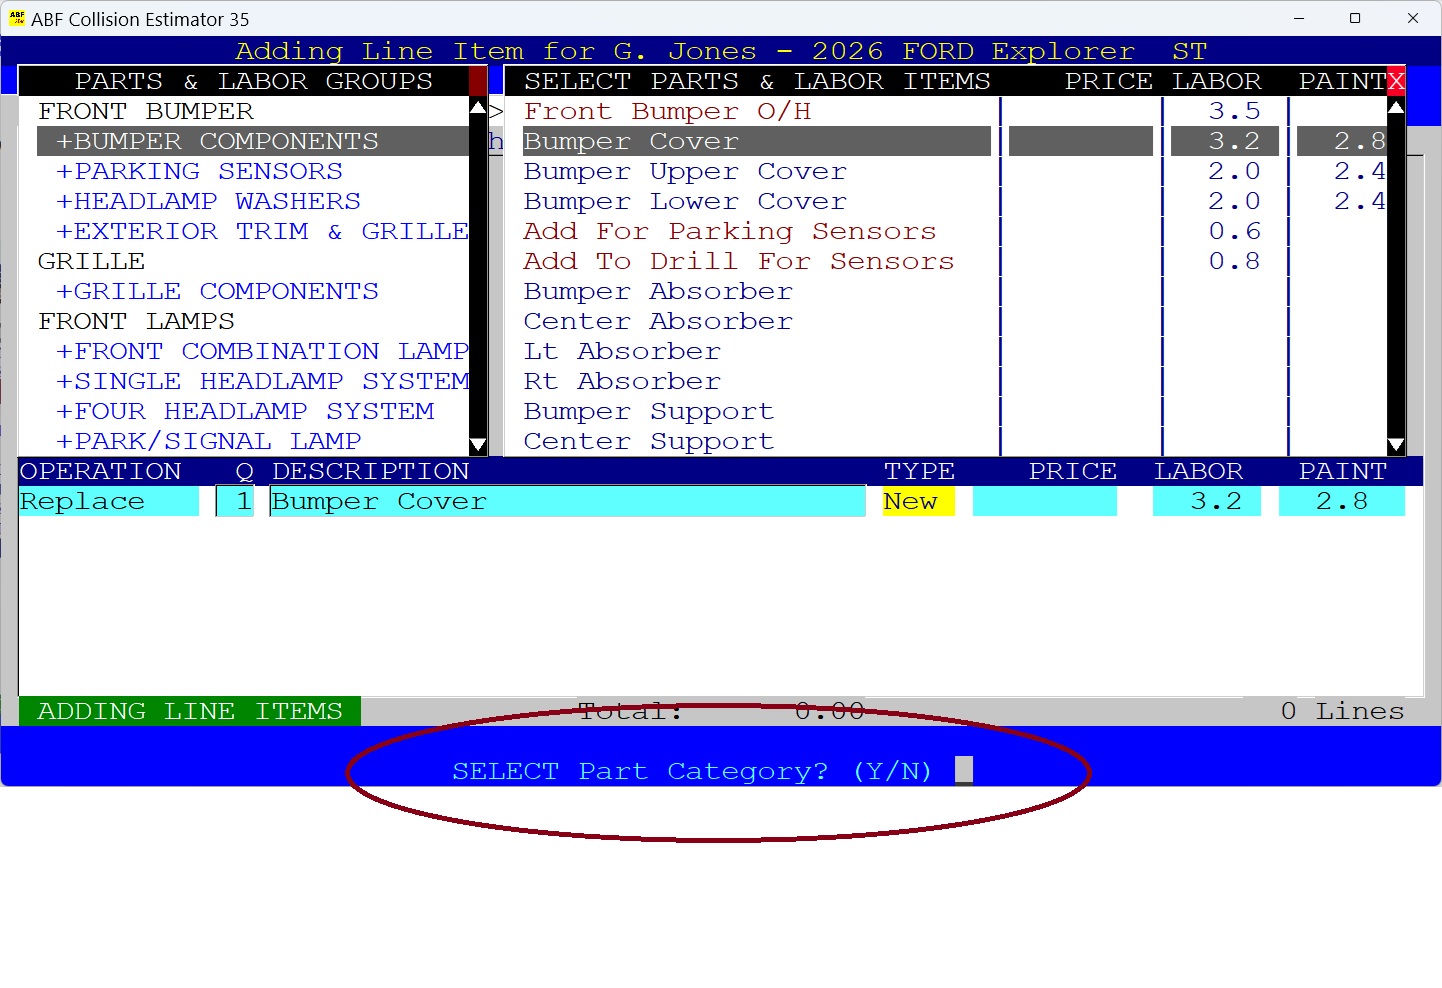
6) Next is the Parts Category Field.
The Parts Category field is required whenever the operation "Replace" is selected. Press the "Y" Key for Yes to Select the Part Type or Press "N" for No.
• 
If You Selected "Yes" To Edit Parts Category.
The following Pop Up Window List of Categories appears, you can use your Mouse or the Up/Down Keys to Select your choice.
• 
7) Next is the Part Price Field.
You can enter the parts price now or later on. If you have a lot of parts that require prices, you can enter them all at once after you complete adding all of the Line Items.
• 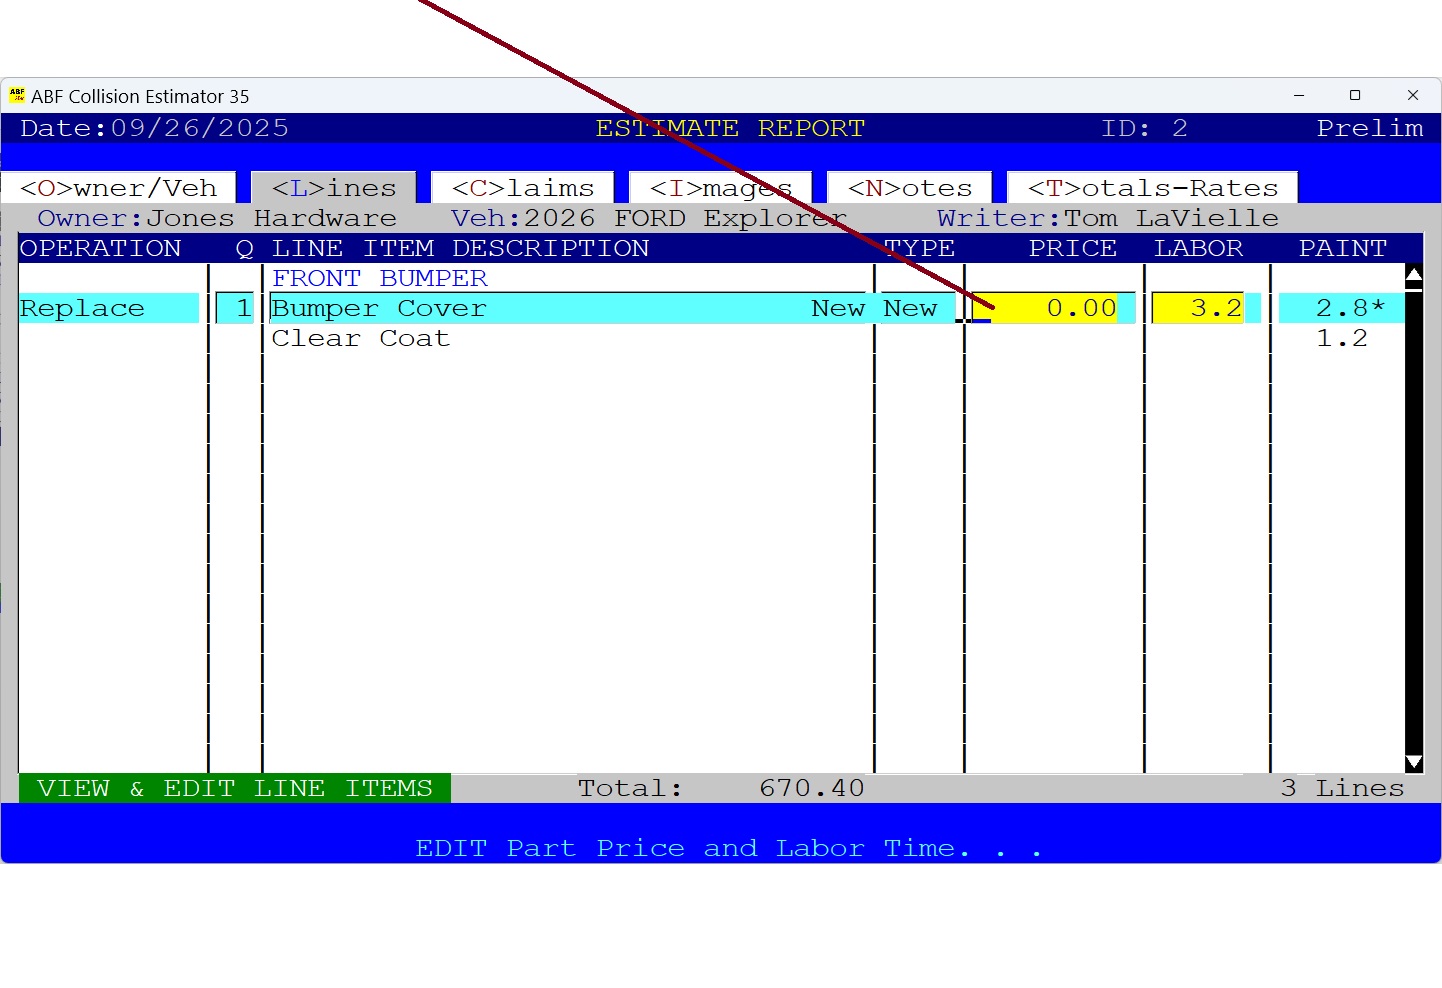
8) Now Review or Edit the Labor Times Field.
Labor Times are shown in hours and in tenths of an hour. When your select "Replace" an item from the ABF database, the database labor time is copied into the estimate labor field. You can override this value if you wish. When finished, Press the ENTER Key.
• 
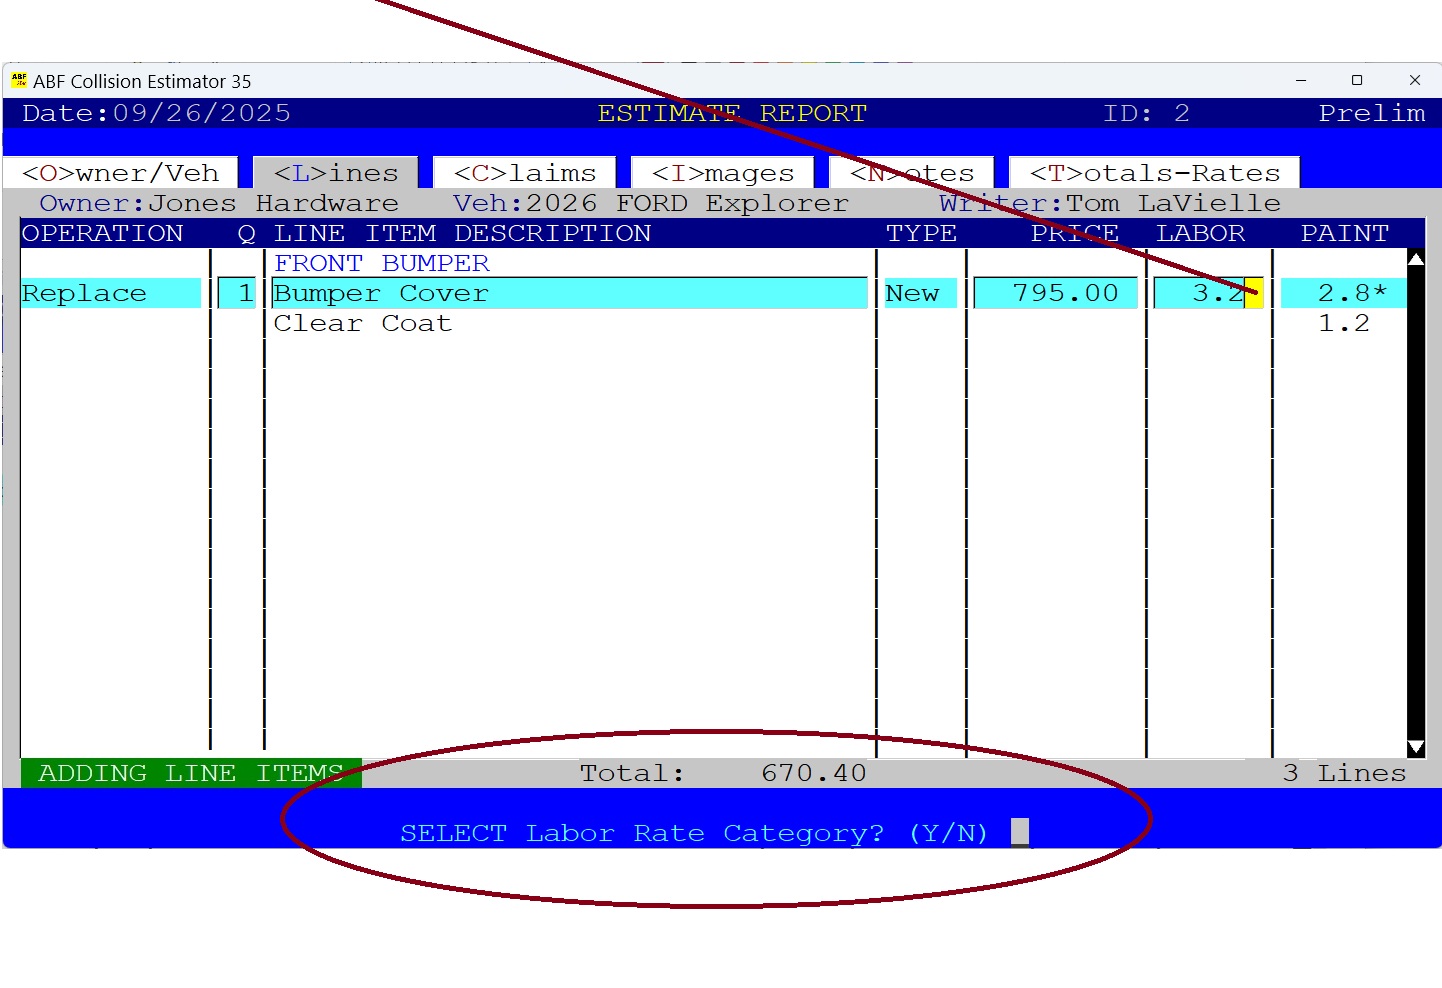
9) Flag This Line Item For A Different Labor Rate.
By default, the Labor Rate is set at the Body Hourly Rate (or Chassis Rate). If you need to change it, Press the "Y" Key. Otherwise, Press "N" or ENTER.
• 
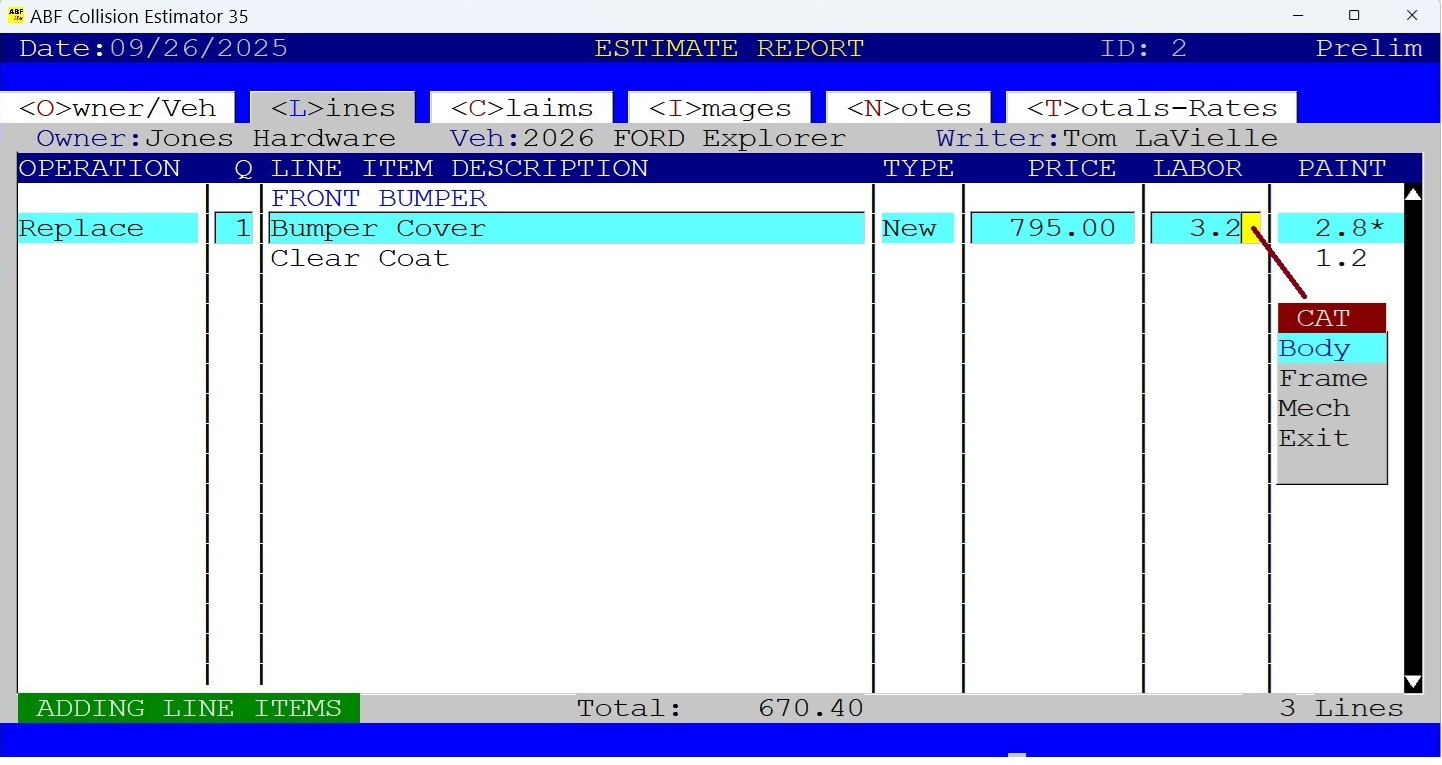
If You Selected "Yes" To Edit Labor Type Rate.
The following Pop Up Window List of Labor Types appears, you can use your Mouse or the Up/Down Keys to Select your choice. Then Press ENTER.
• 
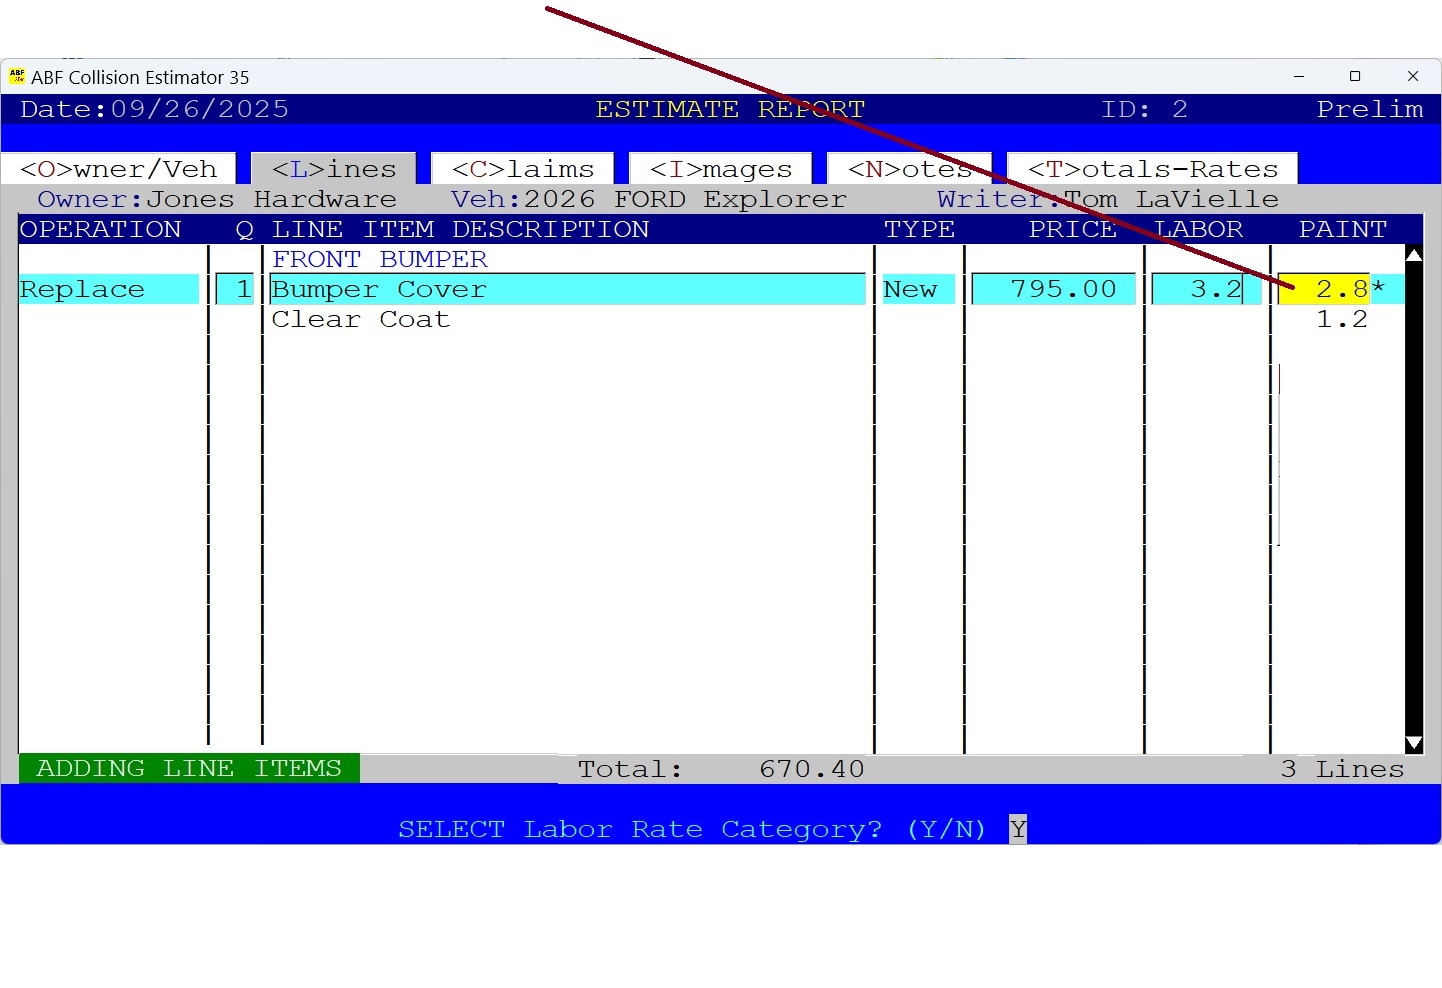
10) Now Review or Edit the Paint Time.
If the Paint Time looks good, Press the ENTER Key. Or Edit the Paint Time in hours and tenths of an hour.
• 
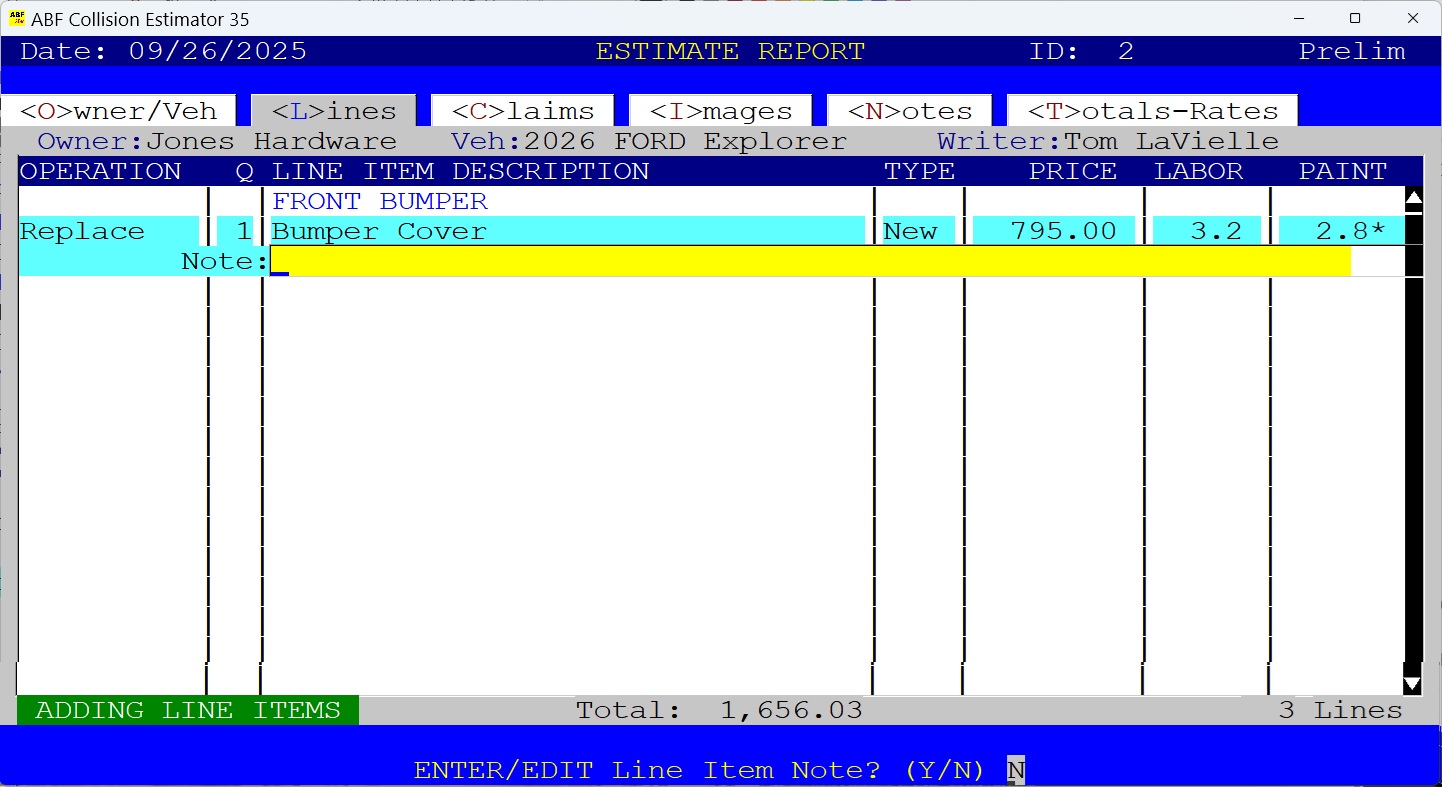
11) Do You Want To Add A Note To This Line Item?.
If the Paint Time looks good, Press the ENTER Key. Or Edit the Paint Time in hours and tenths of an hour.
• 
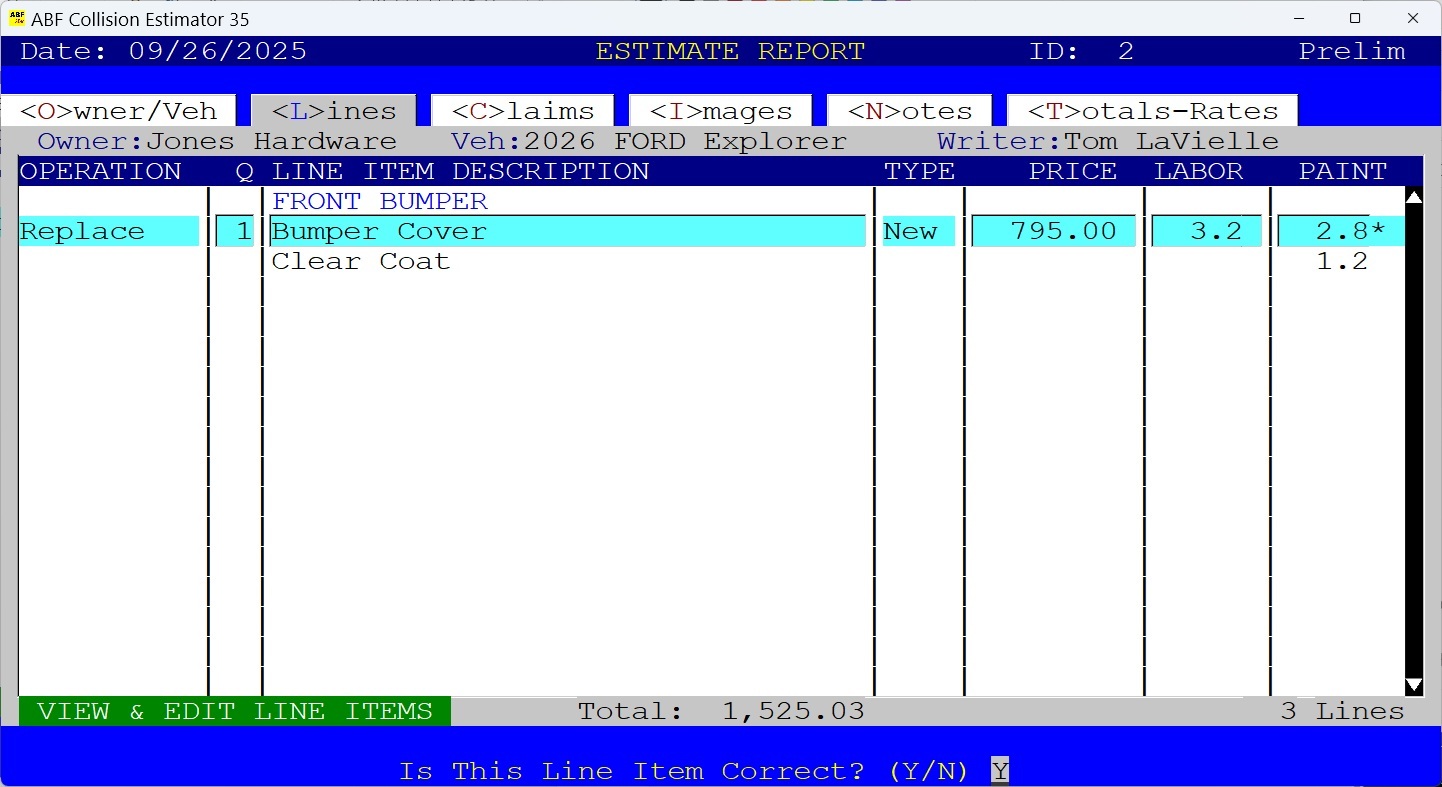
12) Is This Line Item Correct?
If the Paint Time looks good, Press the ENTER Key. Or Edit the Paint Time in hours and tenths of an hour.
• 
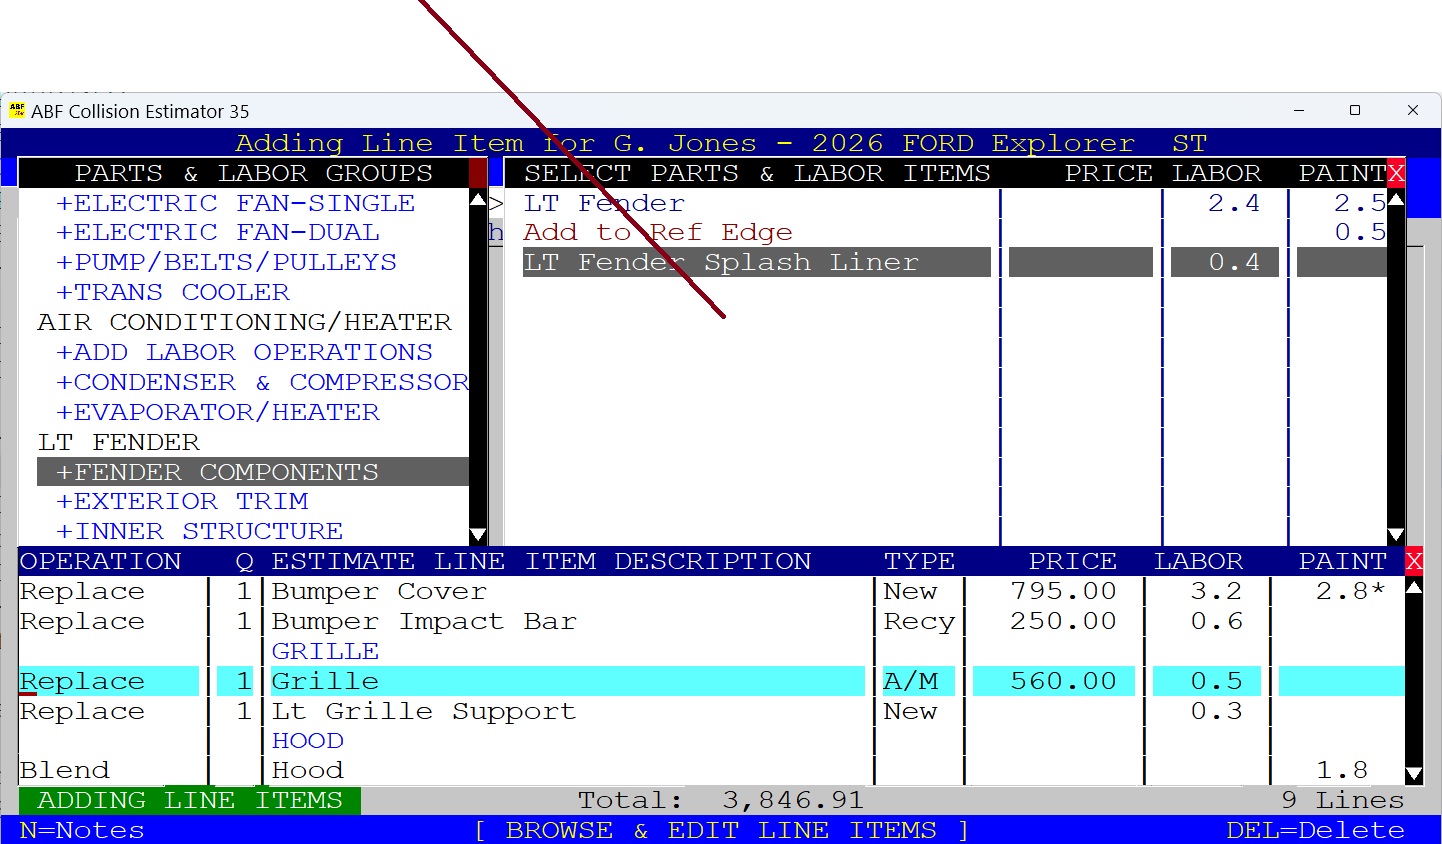
13) How To Edit Newly Added Line Items.
If you need to edit or delete a newly added Line Item, just click the Estimate Line Items Window located at the bottom of the screen. Then use the mouse to click on the line item field that you want to edit. If you want to Delete a Line Item, just Press the DELETE Key (Be sure the Line Item is not in Edit Mode).
• 
Return to the Parts-Labor Database Window.
Using your mouse, Click on the Parts-Labor Database Window - located at the Upper Right hand of the screen. Now you may resume adding more line items. .
•